The DJI Neo app is DJI Fly. Use it to activate the aircraft, install firmware, control Neo from a phone, change camera and safety settings, run intelligent shooting modes, and transfer footage. Install DJI Fly from DJI's official download page before the first flight. iPhone users are directed to the App Store, while Android users should use DJI's official Android download rather than a third-party APK site.
DJI Neo App Setup
A good first setup is more than connecting the app. Charge the aircraft and phone, confirm device compatibility, create or sign in to a DJI account, activate Neo with an internet connection, update every required component, clear internal storage, inspect the aircraft, review flight limits, and complete the first hover in a bright open area before trying Follow or other automatic shots.
This setup guide is based on current DJI Neo product, specification, FAQ, download, manual, and app information. It is not presented as original FPV Drone flight testing. App screens, permissions, firmware prompts, compatible devices, and control options can change, so follow the current on-screen instructions when they differ from a static checklist.
Quick setup summary
Download DJI Fly only through DJI's official page, connect Neo through the in-app Connection Guide, complete activation while signed in and online, then install all offered firmware before flying. Use the first battery for a simple low hover and control check. Save subject tracking and automatic movements for a later flight after the aircraft, app, and pilot are behaving as expected.
App
DJI Fly from DJI's official download page. Confirm the current phone and operating-system compatibility before installation.
Before activation
Charge Neo and the phone, enable internet access, sign in to a DJI account, and have Wi-Fi and Bluetooth available.
First-flight goal
Confirm connection, positioning, camera view, basic control response, battery behavior, and a controlled landing in a clear area.
DJI Neo
Featured gear
DJI Neo Drone
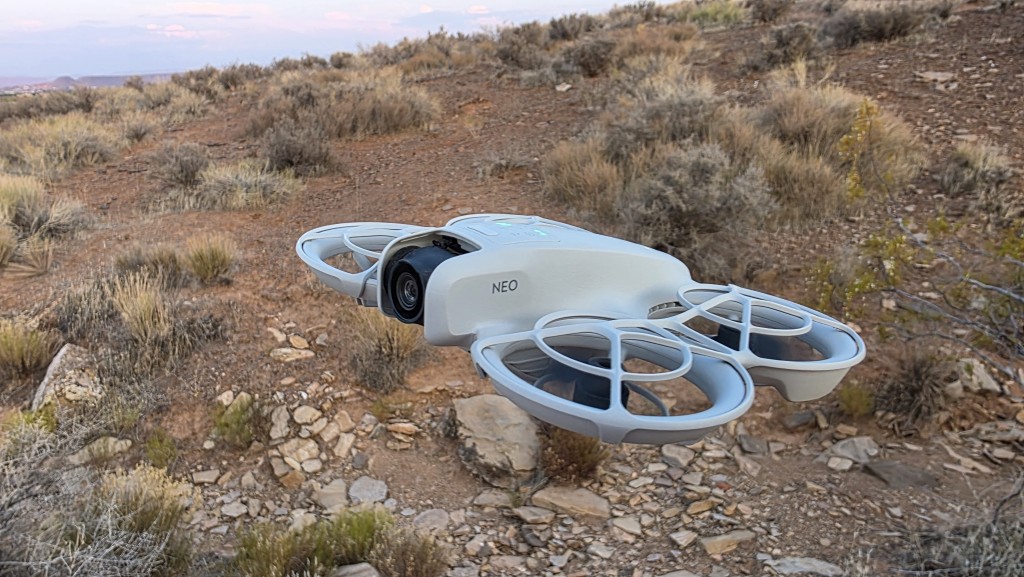
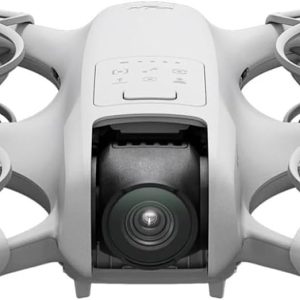
The DJI Neo is a 135 g compact camera drone with palm takeoff, subject tracking, built-in propeller guards, 4K/30fps recording, and controller-free or optional remote and goggles control. Best for: Beginners, travelers, family clips,…
The DJI Neo is a 135 g compact camera drone with palm takeoff, subject tracking, built-in propeller guards, 4K/30fps recording, and controller-free or optional remote and goggles control.
- Best for
- Compact first-generation DJI flying camera for palm launch, subject tracking, short self-filming clips, and…
- Skill level
- Beginner
- Product type
- 135 g selfie drone, Beginner Drones, Camera Drones, DJI Drones, DJI flying camera, Drones,…
- Best for
- Compact first-generation DJI flying camera for palm launch, subject tracking, short self-filming clips, and…
- Skill level
- Beginner
- Product type
- Compact Camera and Selfie Drone
Which app does DJI Neo use?
DJI Neo uses DJI Fly, not DJI GO 4, DJI Mimo, LightCut, or a generic third-party drone app. DJI Fly is the primary setup and mobile-control interface for the original Neo.
What DJI Fly does for Neo
- creates or signs in to the DJI account used for activation;
- connects the aircraft to a compatible phone or controller;
- activates the aircraft before normal use;
- installs aircraft, controller, battery, and accessory firmware when required;
- shows the live camera view and mobile flight controls;
- provides camera, gimbal, transmission, safety, and flight-limit settings;
- starts compatible intelligent shooting modes;
- displays status, warning, positioning, battery, and storage information;
- transfers photos and video from Neo's internal storage.
Neo can perform selected palm-launched automatic shots without holding a phone after initial setup, but that does not make the app optional for activation, updates, configuration, or troubleshooting.
| Phone platform | Where to start | What to verify | What to avoid |
|---|---|---|---|
| iPhone or iPad | Open DJI's official DJI Fly download page and follow its iOS link. | Current App Store publisher, device model, operating-system compatibility, and available storage. | Look-alike apps, old device backups, or a listing reached only through an advertisement. |
| Android phone or tablet | Use the direct Android download provided on DJI's official DJI Fly page. | Official DJI domain, current compatibility information, package download, and enough storage to install. | Third-party APK mirrors, unofficial app stores, search-result ads, or files forwarded by another person. |
What to prepare before activating DJI Neo
Activation goes more smoothly when the app, account, aircraft, battery, and internet connection are ready before pairing begins. Do not start the first setup with a nearly empty phone or aircraft battery.
DJI Neo pre-activation checklist
- Confirm the exact product and bundle. Identify whether the package contains only the aircraft, a three-battery kit, an RC-N3 controller, goggles, a motion controller, or another supported configuration.
- Inspect the box contents. Check the aircraft, propellers, guards, camera, gimbal protector, battery, cables, controller, charging hub, and included spare parts against the retailer listing.
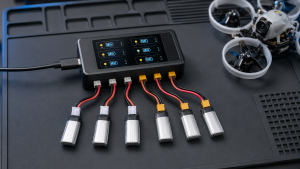
- Charge the aircraft battery. Use a suitable USB-C power source or the supported charging hub. Charging also prepares a battery that may have been stored or shipped in a low-power state.
- Charge the phone and controller. Updates can take time, and an interrupted update creates more work than waiting for a full charge.
- Check phone compatibility. Use DJI's current compatibility information rather than assuming any recent iPhone or Android device will work correctly.
- Install DJI Fly from the official source. Finish installation before connecting to the aircraft.
- Create or sign in to a DJI account. Confirm the email address and password while normal internet access is available.
- Keep internet available. Activation, account validation, firmware files, and current safety information can require an online connection.
- Remove the gimbal protector before power-on. Do not allow the camera to complete its startup movement while physically restrained.
Do not rush the gimbal step: A shipping protector is useful in the case and harmful if it remains installed while the aircraft powers on and tries to initialize the camera.
How to install the DJI Neo app safely
Install DJI Fly on iPhone or iPad
- Open the official DJI Fly download page in the browser.
- Follow DJI's iOS link to the App Store.
- Verify that the listing and publisher are the current official DJI app before installing.
- Open DJI Fly, review the current prompts, and sign in to the intended DJI account.
- Allow the permissions required for local device discovery, connection, media handling, and location-based flight information when the operating system requests them.
Install DJI Fly on Android
- Open DJI's official DJI Fly download page directly and select the Android download.
- Confirm that the address remains on DJI's official domain before downloading the APK.
- If Android requests permission to install an app from the browser or file manager, allow that specific source long enough to complete the official installation.
- After installation, remove the temporary install permission if it is no longer needed.
- Open DJI Fly, sign in, and grant the connection permissions required by the current Android version.
DJI's current Android distribution uses a direct download rather than a normal Google Play installation. That makes source verification important. Do not search for a substitute with a similar icon or name, and do not disable Android security controls more broadly than the official installation requires.
Review permissions instead of denying everything
DJI Fly may request access to Bluetooth, nearby devices, the local network, Wi-Fi information, location, photos, video, or storage depending on the phone and operating system. Some permissions exist because modern phones restrict how an app discovers nearby hardware or saves media. Grant the permissions needed for the feature you are using, then review them in the phone's settings rather than downloading a modified app that promises to bypass the normal workflow.
How to connect and activate DJI Neo
Activation associates the new aircraft with the DJI setup process and must be completed before ordinary use. Keep DJI Fly signed in and the phone connected to the internet until the app confirms completion.
Phone connection and activation steps
- Prepare the aircraft. Insert a charged battery, remove the gimbal protector, unfold or clear any packaging, and place Neo on a stable surface.
- Turn on the phone's connection features. Enable Wi-Fi and Bluetooth, then confirm that DJI Fly has the local-network, nearby-device, and location permissions requested by the phone.
- Power on Neo. Use the standard DJI power sequence: press the power button once, then press again and hold until the aircraft powers on.
- Open DJI Fly. Tap the Connection Guide or the detected-device prompt and select DJI Neo.
- Follow the pairing instructions. The app will guide the phone through the current Wi-Fi or Bluetooth-assisted connection process. Do not improvise a password from an unrelated model.
- Complete activation. Confirm the DJI account and follow every regional, terms, safety, and aircraft-activation prompt.
- Wait for confirmation. Do not assume activation finished merely because the camera view appeared.
- Record the account used. Keep the sign-in information and purchase documentation available for support, service, or a later phone replacement.
If the bundle includes an RC-N3
Charge the controller, connect the phone with the correct cable, power on the controller and aircraft, then use DJI Fly's Connection Guide. Follow the pairing prompt for the exact controller rather than assuming an aircraft-only phone connection also paired the RC-N3. Update the controller if DJI Fly offers separate firmware.
If the bundle includes goggles or motion controls
Activate and update the aircraft first, then pair each compatible component using DJI's current documentation. A multi-component FPV setup adds firmware and pairing dependencies. It is usually easier to confirm a normal phone or controller connection before troubleshooting goggles, a motion controller, and the aircraft at the same time.
Complete firmware updates before the first flight
Firmware is part of the setup, not an optional task to postpone indefinitely. Neo updates have changed feature behavior, including tracking performance and vertical-video support. DJI Fly and the aircraft should both be current before evaluating whether a feature is missing or malfunctioning.
Safe update workflow
- Use a well-charged aircraft battery, phone, and controller.
- Keep the phone on a stable internet connection while the update package downloads.
- Keep Neo, the phone, and any controller close together with the required wireless connections active.
- Start the update from DJI Fly when prompted.
- Do not power off the aircraft, close the app, swap batteries, unplug a required controller, or leave the setup area during installation.
- Allow components to restart and wait until DJI Fly confirms success.
- Reconnect and check for another prompt. A controller, goggles, motion controller, or inserted battery may need an additional update.
- Review important settings after the update because firmware can add options or reset selected values.
If an update fails, keep the aircraft powered, read the exact error, restore internet and battery margin, restart only as DJI instructs, and retry through DJI Fly. DJI's current downloads page also provides the supported DJI Assistant software path when desktop recovery or support-directed maintenance is necessary.
DJI Fly settings to verify before takeoff
Do not copy an influencer's settings without checking the control method, firmware, region, and location. The safest first-flight configuration is conservative and easy to understand.
| Setting or status | What to verify | Why it matters |
|---|---|---|
| Aircraft status | No unresolved red warning, update, calibration, battery, storage, or connection message. | A live camera image alone does not mean the aircraft is ready to fly. |
| Phone permissions | DJI Fly can discover the aircraft, show the map or flight information, and save media as intended. | Denied permissions can look like a hardware connection failure. |
| Maximum altitude and distance | Set conservative limits appropriate for the first open-area hover and local rules. | Small limits reduce the consequences of a wrong input or unexpected movement. |
| Control mode | Use the familiar default stick layout unless there is a deliberate reason to change it. | A mismatched layout can reverse the response the pilot expects. |
| Home Point and RTH | For outdoor manual flight with a supported control method, confirm the Home Point and understand the available Return to Home behavior. | RTH does not avoid obstacles on the original Neo, and a poor altitude or route can create a collision. |
| Positioning and satellites | Wait for the app's normal ready-to-fly status and a reliable position solution when flying outdoors. | Takeoff before positioning is ready can change hover, Home Point, and recovery behavior. |
| Camera and gimbal | Confirm the live view, lens cleanliness, gimbal movement, stabilization mode, resolution, orientation, and recording state. | The flight is wasted if the camera is obstructed, tilted incorrectly, or not recording. |
| Internal storage | Check free space on Neo's 22 GB internal storage. | The aircraft has no microSD slot, so a full internal drive stops new recording. |
| Battery status | Use a charged, correctly seated battery with no error or temperature warning. | The published maximum flight time is not the usable first-flight time. |
| Obstacle environment | Confirm clear space in every direction the aircraft may move. | Neo has downward positioning but no obstacle-avoidance system. |
Calibrate only for a reason
Do not make compass or IMU calibration a ritual performed beside a car, reinforced concrete, electrical equipment, or other interference. Calibrate when DJI Fly requests it, when the manual requires it for the current condition, or when supported troubleshooting identifies a real need. Move to a better location before assuming every warning needs a calibration.
Back up footage before formatting storage
Neo records to 22 GB of internal storage and has no microSD expansion. Use QuickTransfer or a USB-C data connection to copy footage, verify the files, and only then format or delete media. The first setup should include a repeatable transfer and backup routine.
DJI Neo first-flight checklist
The first flight is a system check, not a range, speed, tracking, or battery-endurance test. Use daylight, manageable wind, open space, a clear surface, and enough distance from people, animals, traffic, structures, water, trees, and wires.
Before launch
- Confirm current local airspace permission and operating rules.
- Complete any required flyer knowledge test, registration, or identification requirements for the location and purpose of flight.
- Check weather at ground level and look for stronger wind or turbulence around nearby structures and trees.
- Inspect the propellers, guards, battery latch, camera, gimbal, and aircraft body.
- Remove the gimbal protector and clean the lens.
- Confirm DJI Fly shows the correct aircraft, battery, connection, positioning, storage, and ready status.
- Tell nearby people what the aircraft will do and keep uninvolved people outside the flight area.
First hover and control check
- Launch from a stable open surface with app or controller guidance, or use the documented stationary palm-launch procedure if that is the selected control method.
- Climb only to a low, safe hover and pause.
- Listen for abnormal vibration and watch for drift, warning messages, or unusual gimbal behavior.
- Make small, deliberate control inputs. Confirm climb, descent, yaw, forward, backward, left, and right response only as the current control method allows.
- Start and stop a short recording, then verify that the file appears and plays.
- Return toward the launch area while the battery remains high.
- Land using the documented app, controller, ground, or palm procedure. Do not grab the aircraft in flight.
- Power down, inspect the propellers and guards, and review the flight record and recorded clip.
Successful first flight: A short hover, predictable control response, clean recording, and controlled landing prove more than using the entire battery on day one.
In the United States, the aircraft's approximately 135 g standard weight can fall below the recreational registration threshold, but all recreational flyers still need TRUST and must follow airspace, visual-line-of-sight, and other operating rules. Registration and Remote ID requirements can change with flight purpose or configuration. Rules differ outside the United States.
When to try Follow and other automatic modes
Use Follow, Dronie, Circle, Rocket, or another automatic movement only after the basic connection and hover check succeeds. Automatic does not mean obstacle-aware. The original Neo has no forward, rear, side, upward, or omnidirectional obstacle avoidance.
Start with one clearly visible person in a bright, open area. Walk slowly, confirm the aircraft's direction and framing, and keep someone able to supervise the complete flight path. Our DJI Neo subject-tracking guide explains which modes follow continuously, where tracking works best, and why the route must remain clear.
If the setup process reveals that short battery life, fixed internal storage, limited camera controls, or no obstacle avoidance conflicts with the intended use, the broader DJI Neo review explains the buying tradeoffs and when the newer Neo 2 is the more defensible choice.
DJI Neo app and activation troubleshooting
Troubleshoot the setup in layers. Confirm the official app and compatible phone first, then permissions, account and internet access, aircraft power, connection, activation, firmware, and settings. Changing everything at once makes the real cause harder to identify.
| Problem | First checks | Next step |
|---|---|---|
| DJI Fly will not install | Confirm the official source, supported operating system, compatible device, available storage, and current security prompt. | Restart the phone, download a fresh official installer, and use DJI support if the device is not on the current compatibility path. |
| Android shows no Google Play app | Do not select a look-alike listing. | Return to DJI's official DJI Fly page and use its current direct Android download. |
| DJI Fly cannot find Neo | Check aircraft power, battery seating, Wi-Fi, Bluetooth, nearby-device, location, and local-network permissions. | Restart both devices, reopen Connection Guide, and remove an unintended connection to another DJI device. |
| Activation fails | Confirm DJI account sign-in, internet access, correct date and time, and a completed aircraft connection. | Save the exact error, restart the app, and contact DJI rather than creating multiple accounts or using unofficial software. |
| Firmware update will not finish | Check battery level, phone power, internet stability, component proximity, and available phone storage. | Follow the error-specific recovery prompt and use DJI Assistant only through the official support path when appropriate. |
| Controller will not pair | Verify the exact controller model, cable, power, firmware, and that DJI Fly selected DJI Neo. | Run the current linking procedure from Connection Guide and update the controller separately if prompted. |
| No live camera view | Remove the gimbal protector, verify the correct aircraft connection, review permissions, and look for a camera or firmware warning. | Restart after the app and firmware are current, then contact support if the gimbal or image remains unavailable. |
| Recording stops or will not start | Check the 22 GB internal storage, recording format, aircraft temperature, and active error messages. | Back up footage, verify the copies, then clear or format storage through the supported workflow. |
| Positioning or calibration warning | Move away from metal, vehicles, reinforced concrete, electrical equipment, poor light, and unsuitable ground texture. | Follow DJI Fly's exact instruction and calibrate only when the app or manual calls for it. |
Final check: when DJI Neo is ready for normal use
DJI Neo is ready for normal use when DJI Fly came from the official source, activation completed under the intended account, every required component is current, the app reconnects reliably, no important warning remains, storage and battery status are understood, and the aircraft completed a controlled first hover and landing.
Do not treat activation as the finish line. The safer first-day sequence is app installation, connection, activation, updates, settings, inspection, a simple hover, media verification, and only then an automatic filming mode. That order isolates problems before the aircraft starts moving around a subject on its own.
Save the official DJI Fly and Neo download pages, keep the account information accessible, back up the first successful recording, and repeat the short physical inspection before every later flight.
Frequently asked questions
What is the official DJI Neo app?
The official app is DJI Fly. Use DJI's official DJI Fly download page to reach the current iOS or Android installation path.
Is DJI Fly available on Google Play?
DJI's current Android workflow provides DJI Fly as a direct official download rather than a normal Google Play installation. Start from DJI's website and avoid apps or APKs from unrelated publishers and mirrors.
Can DJI Neo fly without the app?
Selected palm-launched automatic modes can operate without holding a phone after setup. DJI Fly is still needed for initial activation, updates, configuration, live mobile control, diagnostics, and normal media-management tasks.
Does DJI Neo need a microSD card?
No. It has 22 GB of internal storage and no microSD slot. Check free space before recording, transfer files through DJI Fly or a USB-C data connection, and verify backups before deleting or formatting footage.
Should the first flight use Follow mode?
No. Complete a simple low hover, small control inputs, a short recording, and a controlled landing first. Try Follow only after the aircraft, connection, app, positioning, camera, and pilot response are predictable.
Does DJI Neo avoid obstacles during the first flight?
No. Downward sensors support positioning but do not provide flight-path obstacle avoidance. Choose a clear area and supervise every manual or automatic movement.
Do you have to register DJI Neo in the United States?
A standard approximately 135 g Neo used only under the recreational exception can fall below the FAA registration threshold. Other uses or configurations may change the requirement. Recreational flyers still need TRUST and must follow all applicable operating and airspace rules.
Sources
- DJI Fly official download page: current iOS and Android app-distribution path and device-compatibility entry point.
- DJI Neo downloads and support page: current user manual, safety guide, release documentation, DJI Fly information, and supported desktop software.
- DJI Neo official FAQ: activation, controls, intelligent modes, charging, file transfer, app behavior, and operating limitations.
- DJI Neo official specifications: weight, sensing, storage, flight, battery, charging, transmission, and operating values.
- FAA drone registration guidance: current U.S. registration threshold and use-dependent requirements.
- FAA TRUST guidance: U.S. recreational knowledge-test requirement and proof-of-passage information.
Last checked: July 14, 2026.