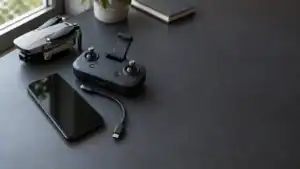
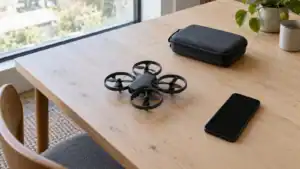
Set up the Holy Stone HS360S in this order: charge both batteries, install HS FLY, pair the drone and transmitter, connect the phone to the transmitter with the supplied cable, calibrate the compass, and wait for stable GPS and the correct Home Point before unlocking the motors. Make the first flight a short, low control check in an open area.
This research-based Holy Stone drone manual follows the official HS360S User Manual V5.2, current Holy Stone support information, current HS FLY listings, and U.S. FAA recreational guidance. It is not presented as original FPV Drone flight testing. App screens, local rules, and available product bundles can change.
Quick setup answer
Prepare at home
Charge the flight battery, transmitter, and phone. Install HS FLY, remove the camera cover, inspect the propellers, and install a compatible memory card before powering on.
Complete outdoors
Pair the aircraft, connect the phone by cable, calibrate the compass away from metal, wait for GPS, verify the Home Point, and review the Return to Home altitude.
Do not skip
The HS360S has no obstacle avoidance. A recorded Home Point and sensible return altitude do not protect it from trees, wires, buildings, or other obstacles.
Drone covered in this guide

Featured gear
Holy Stone HS360S GPS Camera Drone
The Holy Stone HS360S is a 249 g beginner GPS camera drone with brushless motors, Return to Home, HS FLY smart modes, a 3 km manufacturer-rated link, and 4K/20 fps recording to a compatible…
The Holy Stone HS360S is a 249 g beginner GPS camera drone with brushless motors, Return to Home, HS FLY smart modes, a 3 km manufacturer-rated link, and 4K/20 fps recording to a compatible microSD card.
- Best for
- Best for a beginner who wants a low-cost 249 g GPS camera drone with…
- Skill level
- Beginner
- Product type
- Beginner Drones, Camera Drones, Drones, Under 249g Drones
- Best for
- A beginner who wants a low-cost 249 g GPS camera drone with brushless motors,…
- Skill level
- Beginner
- Product type
- Foldable GPS Camera Drone
The complete Holy Stone HS360S setup sequence
Use this table as the master order from opening the box through the first landing. Each pass condition gives you a clear reason to stop rather than carrying an unresolved problem into the next stage.
| Stage | What to do | Pass before continuing |
|---|---|---|
| 1. Inventory | Confirm the drone, battery, transmitter, control sticks, phone cables, charging cable, spare propellers, screwdriver, camera cover, and manual. | Nothing essential is missing, damaged, swollen, bent, or loose. |
| 2. Charging | Charge the flight battery, transmitter, and phone before attempting setup. | All devices show adequate charge and the flight battery is at room temperature. |
| 3. Aircraft | Remove the camera cover, unfold the front arms and then the rear arms, inspect the propellers, and install the battery securely. | Every arm is open, each propeller is sound, the motors are clear, and the battery clicks into place. |
| 4. App and storage | Install HS FLY from an official source and insert a compatible TF or microSD card while the drone is off. | The correct app is installed and the card is seated in the correct orientation. |
| 5. Pairing | Power on the drone on a level surface, power on the transmitter, and allow automatic pairing to complete. | The transmitter gives its long completion beep and the aircraft is no longer waiting to pair. |
| 6. Phone connection | Connect the phone to the transmitter with the supplied data cable and open the live-feed screen in HS FLY. | The app shows the camera feed and believable aircraft, controller, and GPS status. |
| 7. Calibration and GPS | Calibrate the compass in an interference-free area, wait for stable GPS, and confirm the intended Home Point. | No unresolved warning remains and the map or status indication matches the launch location. |
| 8. Flight settings | Keep Beginner Mode enabled, select a slow speed, and set a site-appropriate Return to Home altitude. | The limits and return path fit the actual airspace, obstacles, and launch area. |
| 9. First flight | Unlock the motors, take off, hover low, test one control axis at a time, and land with generous battery reserve. | The drone holds position, responds predictably, and completes a controlled landing. |
The most important sequence is pairing first, connecting the phone second, calibrating in a clean location third, and confirming GPS and Home Point last. Seeing a live camera image does not by itself mean the aircraft is ready for takeoff.
Charge and assemble the HS360S
1. Charge the flight battery and transmitter
Holy Stone specifies a 5V/2A USB source and the original charging cable for both devices. Connect the Type-C plug to the flight battery and charge until all battery indicators remain on. The manual lists about three hours for a full flight-battery charge and about two hours for the transmitter.
Do not recharge a warm battery immediately after flight. Let it cool to room temperature on a nonflammable, nonconductive surface, and never leave it unattended while charging. Stop using a battery that is swollen, punctured, unusually hot, leaking, or physically damaged.
2. Remove the camera cover before power-on
Release the camera-cover buckle, lift the cover gently, and pull it toward the front of the drone. Removing it before power-on prevents the cover from obstructing the camera assembly. Keep the cover nearby so it can be reinstalled after the aircraft is powered off.
3. Unfold, inspect, and install
- Unfold the two front arms first, followed by the rear arms.
- Check all propellers for cracks, chips, bends, looseness, or incorrect mounting.
- Confirm that hair, grass, sand, and packaging are clear of every motor.
- Install the charged flight battery with the power off and push until it clicks securely.
- Remove the control sticks from the transmitter storage slots and install them firmly.
If a propeller must be replaced, match marked propellers to marked motor shafts and unmarked propellers to unmarked shafts. The two types rotate in different directions. An intact propeller in the wrong position is still an unsafe installation.
4. Install a memory card before power-on
The manual supports a Class 10 or faster TF or microSD card up to 128 GB and instructs owners to insert it before turning on the drone. A card is optional for basic flight, but it is the better path for recording the aircraft's highest listed video resolution. Back up an existing card before formatting or reusing it.
Install HS FLY and connect the phone correctly
The HS360S uses HS FLY. Download it through the official HS360S support page, the official Apple App Store listing, or the official Google Play listing.
Holy Stone uses different apps across its product line. Do not substitute Ophelia GO, Ophelia FLY, HS GPS, or another similarly named app merely because it appears in a search result. If the model printed on your aircraft is not HS360S, use our Holy Stone drone app compatibility guide before continuing.
Important connection difference
The HS360S phone connection is wired through the transmitter. Do not follow generic Holy Stone instructions that tell you to join a drone-created Wi-Fi network. Those instructions apply to other models and connection systems.
Power on and pair the aircraft
- Place the drone on a level, nonmetal surface with its nose pointing forward.
- Press and hold the flight-battery power switch until the aircraft turns on. A blinking red status indicator means it is waiting to pair.
- Short-press the transmitter power button once, then press and hold it to turn the transmitter on. A short press alone only displays its battery level.
- Leave both devices still while they pair automatically. Holy Stone says this can take about 40 seconds.
- Wait for the transmitter's long completion beep before moving to the phone connection.
Connect the phone to the transmitter
- Extend the phone holder and secure the phone without pressing a side button.
- Select the supplied Type-C, Lightning, or Micro-USB cable that matches the phone.
- Connect the end marked for the transmitter to the controller and the other end to the phone.
- Unlock the phone, open HS FLY, and enter the live-feed interface.
- On Android, select Charge only if the phone asks which USB connection mode to use. The HS360S manual warns that another mode can prevent the connection.
A successful connection should provide a live camera view plus status information such as the drone battery, transmitter battery, GPS signal, flight distance, and flight altitude. Do not treat a phone charging symbol as proof that the data connection is working.
If HS FLY says “Not Connected”
- Confirm that the drone and transmitter completed pairing before opening the live view.
- Reseat both ends of the cable and remove a phone case that prevents full insertion.
- Make sure the transmitter-marked end of the cable is connected to the transmitter.
- On Android, select Charge only again and close competing USB or camera apps.
- Close HS FLY completely, power down the aircraft and transmitter, and repeat the startup order.
- Try the other official cable supplied for the correct connector type, if available.
Calibrate the compass and confirm the Home Point
Complete calibration outdoors in a wide, open location. Keep away from vehicles, steel structures, reinforced concrete, manhole covers, metal tables, power lines, signal towers, large speakers, and other magnetic or radio interference sources. If the app shows a high compass-interference value, move the entire setup rather than trying to calibrate through the interference.
HS360S compass calibration steps
- Push both joysticks simultaneously toward the inner upper corners to begin calibration.
- Hold the drone level and rotate it horizontally until the transmitter beeps once.
- Point the nose of the drone upward and rotate it again.
- Stop when the transmitter beeps a second time and the aircraft indicator turns solid blue.
If the indicator continues flashing red and blue or the app still reports compass interference, do not unlock the motors. Repeat the procedure in a different location after checking for hidden metal beneath the launch surface.
Wait for stable GPS and verify Home Point
After calibration, leave the aircraft still with a clear view of the sky. Holy Stone's current GPS guidance says to wait for stable GPS status and Home Point confirmation before takeoff rather than relying only on the number of satellites. Confirm that the map or status indication places the Home Point at the actual launch location.
Do not launch under a roof, dense trees, beside a tall building, or from reinforced concrete when the aircraft is struggling to establish GPS. Move to a more open location and start again. The ability to unlock or enter Attitude Mode is not proof that GPS-assisted Return to Home is ready.
Review Return to Home before takeoff
The HS360S has Smart RTH, Failsafe RTH, and Low Voltage RTH. All depend on suitable conditions, and RTH is available only in GPS mode. The aircraft can return toward the last recorded Home Point after the pilot commands it, after the transmitter link is lost, or when battery logic triggers a return.
Beginner Mode is enabled by default. The current manual lists default limits of 98 feet for distance, 98 feet for altitude, and 66 feet for return altitude. Keep Beginner Mode on for initial flights. Set the return altitude high enough to clear relevant obstacles along the route, but never assume a software setting overrides airspace limits or local rules.
RTH is not obstacle avoidance
The HS360S cannot detect and route around obstacles during return. It may climb to the configured return altitude before flying toward the Home Point. Check the entire return path, keep the transmitter on, and learn how to cancel RTH with the RTH button if control is restored and a safer manual route is available.
Complete the site and preflight checks
The aircraft may weigh 249 g in the manufacturer-listed configuration, but weight is only one part of legal setup. For U.S. recreational flying, the FAA requires the free TRUST test, visual line of sight, yielding to crewed aircraft, prior authorization in controlled airspace, and operation at or below 400 feet in Class G airspace. The FAA registration exception applies only to aircraft under 250 g flown under the recreational exception. Verify the actual takeoff weight and the purpose of the flight, especially after adding accessories.
Outside the United States, check the aviation regulator and local rules for the place where the flight will occur. A 249 g label is not a universal exemption from registration, training, airspace, privacy, or site restrictions.
Location and conditions
- Confirm that the airspace and site permit the planned flight.
- Check current restrictions, nearby emergency activity, and any required authorization.
- Choose a wide, dry, open area away from people, traffic, trees, wires, water, and buildings.
- Avoid rain, snow, fog, poor visibility, and wind that is unsuitable for a lightweight first-flight aircraft.
- Use a flat, nonmetal launch surface with a clear view of the sky.
Aircraft and controller
- Camera cover removed and all four arms fully unfolded.
- Propellers undamaged, correctly mounted, and secure.
- Motors clear of debris and able to turn freely while powered off.
- Flight battery fully seated, transmitter charged, and phone secured.
- Memory card installed and recognized if recording is planned.
App, navigation, and return plan
- HS FLY displays a stable live view and believable battery information.
- No unresolved compass, GPS, battery, connection, or storage warning remains.
- GPS is stable and the Home Point matches the launch location.
- Beginner Mode remains on and the return altitude fits the site.
- The outbound path, return path, and landing area are clear.
Use this safer HS360S first-flight routine
The first battery should prove that the controls, positioning, and landing sequence work. It should not be used to explore the advertised range, try automated camera moves, follow a person, or test low-battery behavior.
- Select the slowest practical speed. Short-press the speed switch until the transmitter shows Camera Mode. The manual lists Camera Mode at 3 m/s, Normal Mode at 5 m/s, and Sport Mode at 7 m/s.
- Stand behind the drone. Point its nose away from you so left and right match your perspective before takeoff.
- Unlock the motors. Push both joysticks toward the inner lower corners until the propellers begin turning. If no command follows, the motors lock automatically after about 20 seconds.
- Use one-key takeoff. Short-press the takeoff and landing button, then let the drone rise and settle before moving either stick.
- Hover low in open space. Keep it close enough to see its orientation. Release the sticks and confirm that it holds position without severe drift, vibration, or unexpected rotation.
- Test one control at a time. Make small forward and backward movements, then left and right movements, and finally gentle yaw turns.
- Check stopping distance. Release the sticks after each short movement and observe how much room the aircraft needs to stop.
- Practice orientation. Turn 90 degrees, make one small movement, and return the nose to the original direction before continuing.
- Land early. Return over the launch area and short-press the landing button, or descend gently with the throttle. Keep the area clear until the motors stop.
Do not exit GPS mode for an outdoor first flight simply because satellite lock is taking time. The manual allows the pilot to hold the speed switch for two seconds and enter ATTI MODE when GPS is weak, but GPS-related functions then become unavailable and the aircraft requires more active correction. Move to a better location instead.
Keep the emergency-stop function for a true emergency. Holding the takeoff and landing button for two seconds below 16 feet stops the propellers immediately, causing the drone to fall. It is intended for an immediate threat such as an uncontrollable collision risk, not as a normal landing method.
HS360S setup troubleshooting
| Problem | Likely cause to check | First corrective action |
|---|---|---|
| Transmitter does not pair | Low charge, wrong startup order, or insufficient pairing time. | Charge both devices, power on the level aircraft first, power on the transmitter second, and wait through the full pairing cycle. |
| HS FLY shows no live view | Loose or blocked phone cable, wrong cable orientation, or Android USB mode. | Reseat the correct supplied cable, remove an obstructing phone case, unlock the phone, and select Charge only on Android. |
| Motors will not start | Weak GPS, low flight battery, incomplete compass calibration, or incorrect unlock-stick position. | Do not force takeoff. Move to open sky, recharge if needed, recalibrate away from interference, and repeat the inner-lower-corner unlock input. |
| No Home Point confirmation | Blocked sky view, movement during initialization, metal under the aircraft, or nearby interference. | Power down and relocate to open, nonmetal ground. Restart, keep the aircraft still, and wait for stable GPS. |
| Unstable hover or abnormal posture | Compass interference, poor GPS environment, damaged propeller, or incorrect propeller placement. | Land immediately, inspect the propellers, and recalibrate in a different open location away from metal and power infrastructure. |
| Video is delayed or intermittent | Signal obstruction, device workload, connection problem, or aggressive aircraft movement. | Stay in open space, face the transmitter and phone toward the drone, reseat the cable, close background apps, and use gentle inputs. |
| RTH climbs unexpectedly | The aircraft is below the return altitude configured in HS FLY. | Keep the path clear and review the return-altitude setting before the next flight. Cancel RTH only when control is available and manual flight is safer. |
Save the exact warning text and take a screenshot before restarting when a problem repeats. If the same fault remains after a complete charge, a clean restart, and a test in a second open location, contact Holy Stone support with the phone model, operating-system version, app version, warning message, and a short description of the startup sequence.
Postflight, media, and battery storage
After every landing
- Stop video recording before powering down so the current file can close properly.
- Confirm that the motors have stopped, then power off the drone and transmitter.
- Remove the flight battery only after it is powered off.
- Inspect the propellers, motors, airframe, camera, and battery for damage, debris, or unusual heat.
- Let the flight battery cool to room temperature before charging.
- Back up important photos and videos before formatting or reusing the memory card.
- Fold the arms and reinstall the camera cover only after power-off.
Know where the footage is stored
Without a TF or microSD card, the manual says photos and videos are saved to the HS FLY album and the phone gallery. With a card installed, media is saved to the app album and the card. The aircraft, transmitter, and phone must be connected to view aircraft media through the app.
Use the battery's storage protection correctly
Holy Stone says a fully charged HS360S battery that remains unused for more than three days will self-discharge to about 70 to 75 percent to support battery health. That is expected behavior, not proof of a defective pack. Do not repeatedly top it back to full charge during storage.
Store the battery in a cool, dry place away from moisture, direct sunlight, children, pets, combustible material, and extreme temperature. Inspect it before the next charge. A damaged or swollen lithium battery should be removed from service and handled through an appropriate local battery-recycling or hazardous-waste program.
Final setup takeaway
The HS360S is straightforward to prepare when every readiness check has a visible result: the transmitter completes pairing, HS FLY shows a stable wired connection, compass calibration finishes, GPS becomes stable, the Home Point matches the launch site, and no warning remains.
The mistakes most likely to create trouble are following Wi-Fi instructions meant for another Holy Stone model, calibrating beside metal, taking off before Home Point confirmation, setting an unsafe return altitude, and treating RTH as obstacle avoidance. Keep Beginner Mode enabled, make the first flight short, and land before battery warnings turn the return into an automated event.
If you are still deciding whether this is the right beginner aircraft, read our full Holy Stone HS360S review for its camera, battery, GPS-feature, and buyer-fit limitations.
Check the current HS360S package
Verify the battery count, supplied phone cables, charging equipment, spare propellers, seller, and warranty coverage before comparing offers.
Holy Stone HS360S setup FAQs
Which app does the Holy Stone HS360S use?
The HS360S uses HS FLY. Download it from Holy Stone's HS360S support page or its official Apple App Store or Google Play listing. Other Holy Stone models may use different apps.
Does the HS360S phone connect through Wi-Fi?
No separate phone-to-drone Wi-Fi selection is part of the current HS360S manual procedure. The phone connects to the transmitter with the supplied Type-C, Lightning, or Micro-USB cable, and HS FLY displays the live feed and flight information.
Should the HS360S compass be calibrated before flight?
Follow the current manual and complete the compass-calibration sequence during setup, after moving to a meaningfully different location, or when the aircraft or app indicates that calibration is needed. Always calibrate away from vehicles, steel, reinforced concrete, magnets, and strong electrical or radio interference.
How do I know the HS360S is ready to take off?
The transmitter should be paired, HS FLY should show a stable live view and sensible status data, compass calibration should be complete, GPS should be stable, and the Home Point should match the launch location. Do not take off with an unresolved warning.
Can the HS360S fly without a phone?
The transmitter provides the basic flight controls, takeoff and landing, camera controls, speed selection, and RTH button. The phone and HS FLY are still important for live video, the map, detailed status, flight settings, return altitude, and app-based flight features. Complete the first setup with the phone connected.
Why does the HS360S climb when Return to Home starts?
If the drone is below the Return to Home altitude set in HS FLY, it can climb before flying back toward the recorded Home Point. This behavior is intended to follow the return setting, but the drone cannot detect obstacles, so the altitude and route must be reviewed before takeoff.
Can a beginner fly the HS360S indoors?
Indoor flight can require leaving GPS mode and relying on optical-flow positioning and altitude hold. Optical flow depends on lighting, floor texture, height, and speed, while the space available for corrections is limited. An open outdoor first flight with stable GPS is the safer learning environment.
Sources
- Holy Stone HS360S User Manual V5.2: official charging, assembly, wired app connection, calibration, flight, RTH, troubleshooting, specifications, media, and storage instructions.
- Holy Stone HS360S Support: official HS FLY downloads, tutorial, model support, and manual access.
- Holy Stone HS360S Product Information: official current model overview, wired phone connection, battery protection, GPS, and product positioning.
- Holy Stone GPS Lock Troubleshooting Guide: official guidance on stable GPS, Home Point confirmation, open-sky setup, and avoiding metal or reinforced surfaces.
- FAA Recreational Flyers and Community-Based Organizations: current U.S. TRUST, visual-line-of-sight, airspace, altitude, and operating requirements.
- FAA Drone Registration: current U.S. registration threshold, recreational exception, and Remote ID relationship.
Last checked: July 28, 2026. Holy Stone app versions, support downloads, product bundles, and aviation rules can change.