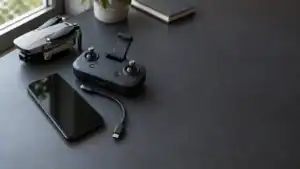
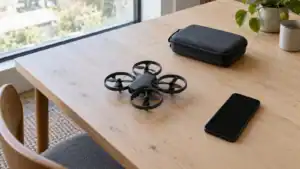
An FPV drone is a drone flown primarily from the live view of a camera on the aircraft, usually through goggles or an FPV display. FPV stands for first-person view. It describes the pilot's viewing perspective, not a specific frame shape, speed, brand, or flight mode. A stabilized beginner kit, cinewhoop, racing quad, freestyle build, or long-range aircraft can all be FPV.
Quick answer
FPV stands for first-person view. The defining feature is that the onboard camera feed becomes the pilot's primary view for flying. A complete setup also needs a control link, compatible video equipment, a battery system, and a safe learning path.
Core experience
The onboard camera feed is the primary piloting view, most often through goggles or a dedicated FPV display.
Minimum system
Drone, radio control link, FPV camera and video link, goggles or display, flight batteries, and the correct charger.
Best beginner approach
Choose one compatible ecosystem, practice in a simulator or assisted mode, and progress to manual flight gradually.
Main buying risk
A radio, receiver, goggles, video transmitter, battery, and charger can all be individually good yet incompatible together.
How an FPV drone works
An FPV system performs two jobs at the same time. The control system carries stick and switch commands from the pilot to the aircraft. The video system carries the camera image from the aircraft back to the pilot. These are logically separate links even when a manufacturer packages them inside one integrated ecosystem.
- The onboard FPV camera captures a forward-facing view.
- A video transmitter, often shortened to VTX, sends that live image over an analog or digital link.
- A receiver in the goggles or display decodes the video so the pilot can see where the drone is pointing.
- The pilot moves the radio sticks or another supported controller.
- A receiver on the aircraft passes those commands to the flight controller.
- The flight controller calculates how the motors must change speed, then sends commands through the electronic speed controllers.
The live image is the defining FPV feature, but the control link is what actually flies the drone. Losing video and losing control are different failures, which is why pilots monitor both video quality and radio-link health.
Important distinction: the recorded video and the live piloting feed are not always the same. Some aircraft record high-quality footage onboard while transmitting a lower-bitrate live view. Other small analog drones may record only the goggle feed, and some do not record unless the goggles include a DVR.
The parts of an FPV system
A complete FPV setup is a chain. Compatibility must be checked at every connection in that chain, especially the radio protocol, video ecosystem, battery voltage, connector, charger support, mounting size, and firmware target.
| Component | What it does | What to verify |
|---|---|---|
| Frame and motors | Provide the structure, thrust, and physical protection for the aircraft. | Propeller size, motor size, battery voltage, payload, replacement-part availability, and intended use. |
| Flight controller | Reads sensors and pilot commands, then calculates how the aircraft should respond. | Firmware target, receiver connection, available UARTs, video support, mounting pattern, and power requirements. |
| ESC | Regulates the power sent to each motor. | Voltage rating, current capacity, motor compatibility, firmware, connector or soldering requirements. |
| Radio and receiver | Carry control commands from the pilot to the drone. | The same protocol and frequency family on both ends, plus compatible firmware and regional settings. |
| FPV camera and VTX | Capture and transmit the live piloting view. | Analog or a specific digital ecosystem, voltage, mounting space, antenna, supported channels, and regional output limits. |
| Goggles or display | Receive and show the live FPV feed. | Direct compatibility with the VTX, receiver module needs, antennas, recording support, fit, and corrective-lens options. |
| Flight battery | Powers the aircraft and onboard electronics. | Cell count, voltage, connector, capacity, discharge capability, dimensions, weight, and aircraft limits. |
| Battery charger | Charges and, when supported, balances and storage-charges the pack. | Battery chemistry, cell count, connector or adapter, balance lead, input power, charge current, and safe operating procedure. |
| Antennas | Send and receive radio-frequency energy for control and video. | Frequency, connector type, polarization, mounting, and whether the transmitter can be powered safely without an antenna. |
Betaflight's official documentation describes the flight controller as the onboard computer that reads sensors, calculates the required action, and commands the ESCs and motors. It can also manage peripherals such as receiver telemetry, the VTX, LEDs, and on-screen flight data. That makes the flight controller central to a custom or bind-and-fly quad, but it does not make every receiver or video system automatically compatible.
If you are considering a custom build, the FPV drone build-kits guide explains RTF, BNF, PNP, and component-based build paths in more detail. Our FPV drone battery guide covers cell count, LiPo versus LiHV, connectors, charging, storage, and safety when you reach the power-system side of the build.
How FPV controls feel different
Most conventional camera drones are designed to settle into a stable hover when the pilot centers the sticks. Traditional FPV freestyle and racing drones are commonly flown in Acro or Manual mode, where the aircraft does not automatically level itself after the pitch or roll stick is released.
In manual flight, the pitch and roll sticks command rotational rate rather than a fixed tilt angle. The pilot must continuously manage attitude and throttle. That produces the smooth dives, rolls, gaps, reversals, and coordinated turns associated with FPV, but it also creates a much steeper first-flight learning curve.
FPV is not the same thing as Manual or Acro mode. FPV describes the view used to pilot the aircraft. Manual or Acro describes how the flight controller responds to stick input. An FPV aircraft can use stabilization or altitude assistance, and switching a normal camera drone into a less-assisted mode does not automatically make it an FPV drone.
Not every FPV drone starts in full manual control. Beginner kits may offer self-leveling or altitude-assisted modes, while integrated aircraft can add GNSS positioning, braking, motion control, or an emergency pause feature. Those assists can reduce the initial workload, but they do not make the aircraft obstacle-proof or remove the need to understand its flight mode.
Four controls every FPV pilot must coordinate
- Throttle: changes total motor output and affects climb, descent, and how much lift is available during a maneuver.
- Yaw: rotates the nose left or right.
- Pitch: rotates the nose forward or backward.
- Roll: rotates the aircraft left or right around its lengthwise axis.
The practical takeaway is simple: seeing through the camera is only half of FPV. Learning to control the aircraft smoothly, especially in Manual mode, is the skill that takes practice.
Common types of FPV drones
Tiny whoops
Tiny whoops are small ducted or propeller-guarded quads commonly used indoors and in compact practice spaces. Their low mass and protected propellers can make routine crashes less destructive, although they can still injure people, pets, or property. They are a common way to build stick skills without starting with a powerful outdoor freestyle quad.
Cinewhoops
Cinewhoops emphasize protected propellers and controlled movement for close-proximity, indoor, or cinematic flying. Some carry an action camera, while integrated models may record stabilized footage onboard. Our FPV drone videography workflow explains how platform choice, shot planning, stabilization, media handling, and commercial-production requirements fit together. Propeller guards reduce certain contact risks, but they are not permission to fly recklessly around people.
Freestyle drones
Freestyle quads prioritize agility, durability, and acrobatic control. A typical freestyle setup is manually flown and designed to be repaired as motors, arms, antennas, and other parts wear or break. This is the category most people picture when they think of rolls, dives, power loops, and technical obstacle lines.
Racing drones
Racing builds prioritize speed, response, low weight, and a dependable low-delay video feed. They are optimized for navigating gates and a defined course rather than producing stabilized aerial photography.
Long-range FPV aircraft
Long-range builds emphasize efficiency, radio-link design, antennas, GPS-based recovery features, and battery reserve. Our long-range FPV guide covers control and video links, signal health, failsafes, battery reserve, and GPS Rescue in more detail. The equipment's technical capability does not override aviation rules.
Integrated FPV camera drones
An integrated model packages the aircraft, video system, goggles, controller support, batteries, firmware, and safety features into a more controlled ecosystem. The DJI Avata 2 FPV drone is an example: DJI lists O4 video transmission, built-in propeller guards, GNSS, a 377 g takeoff weight, and support for its goggles and controller ecosystem. It is easier to approach than a custom build, but it is less open and repair-oriented than a conventional hobby FPV quad.
FPV drone versus a normal camera drone
A camera drone can provide a live view on a phone or controller, so the presence of video alone does not explain the entire difference. The meaningful distinction is how the aircraft is designed to be piloted and what the system prioritizes.
| Decision factor | Traditional hobby FPV drone | Typical camera drone |
|---|---|---|
| Primary view | Low-delay live feed in goggles or an FPV display | Live camera view on a phone, screen controller, or app |
| Flight behavior | Often Manual or Acro flight with continuous pilot control | Usually self-leveling with position hold and stabilized hovering |
| Camera movement | Camera is commonly fixed at an upward angle; the whole aircraft aims the view | Multi-axis gimbal typically aims and stabilizes the camera independently |
| Main use | Immersive flying, racing, freestyle, close-proximity video, and dynamic movement | Aerial photos, smooth establishing shots, mapping, inspection, and automated camera moves |
| Repair model | Many hobby builds use replaceable, soldered, and configurable components | More commonly relies on model-specific parts and manufacturer service |
| Beginner workload | Can be high in Manual mode; simulators and assisted modes reduce the initial risk | Usually lower because the aircraft handles leveling and position stabilization |
If the goal is to park the aircraft in the sky and compose a photograph, a conventional camera drone is normally the simpler tool. If the goal is to feel the flight path and steer the camera by moving the aircraft, FPV is the better match.
Analog versus digital FPV video
The video ecosystem is one of the most consequential choices because the camera, VTX, goggles, receiver hardware, and antennas must form a compatible path. A radio protocol such as ExpressLRS controls the aircraft, but it does not determine whether the video is analog or digital.
| Factor | Analog FPV | Digital FPV |
|---|---|---|
| Image | Lower-detail image with visible noise as the signal weakens | Cleaner and more detailed live view within supported link conditions |
| Cost and weight | Often the lower-cost and lighter path for small aircraft | Air units and compatible goggles can increase system cost, size, and power demand |
| Signal behavior | Usually degrades gradually through increasing static and breakup | Can remain clear longer, then show blocking, freezing, or a sharper loss of usability |
| Compatibility | Broad 5.8 GHz analog interoperability is possible when bands, channels, antennas, and regional rules match | Normally requires the camera or air unit and goggles to belong to the same supported ecosystem |
| Best fit | Budget kits, tiny whoops, racing, and pilots who value simple, lightweight equipment | Pilots who prioritize a clearer view, onboard recording options, or a more integrated experience |
Do not buy goggles first simply because the screen specifications look good. Choose the aircraft or video ecosystem you expect to use, confirm the exact air-unit compatibility, then select goggles that support it. The FPV goggles compatibility guide goes deeper into analog, digital, and integrated-goggle buying checks.
How to start flying FPV
- Choose the experience you want. Decide whether the goal is indoor practice, freestyle, racing, immersive cinematic flight, or conventional aerial photography. This prevents buying an FPV system for a job better handled by a camera drone.
- Select one video ecosystem. Choose analog or a specific digital platform before buying goggles and an aircraft separately.
- Select one control protocol. The transmitter and aircraft receiver must match. ExpressLRS is one current option, but an ELRS radio will not bind to every drone merely because both operate around 2.4 GHz.
- Practice before the first Manual-mode flight. Use a simulator with a compatible radio, an assisted flight mode, or both. Practice arming, disarming, coordinated turns, controlled landings, and recovering from a bad approach.
- Verify the whole power path. Match battery voltage, cell count, connector, physical size, charger chemistry support, and charge settings. Never assume a connector adapter makes an otherwise incompatible battery safe.
- Configure failsafes and switches. Confirm the arm switch, flight modes, link-loss behavior, on-screen battery warnings, and any emergency stop, brake, or recovery feature before takeoff.
- Inspect with propellers removed. Perform receiver, motor-direction, firmware, and bench checks without propellers whenever the procedure allows. Reinstall them only after the aircraft responds correctly.
- Use a suitable first-flight area. Choose a legal open space away from people, traffic, animals, and fragile property. Use a co-located visual observer when required or when goggles prevent you from maintaining situational awareness.
ExpressLRS documentation separates radio setup, transmitter and receiver firmware, receiver wiring, flight-controller configuration, binding, and bench testing into distinct steps. That is a useful model for any FPV system: compatibility is a process to verify, not a logo to assume.
If you want to move from understanding the system to choosing a complete setup, our FPV drones for beginners guide compares three practical starter paths and helps narrow the choice by where and how you want to fly.
Three practical beginner paths
There is no single best first FPV purchase. The right starting path depends on whether you value simplicity, repairable hobby skills, or equipment you can reuse across several aircraft.
| Starting path | Best for | Existing example | Verify before buying |
|---|---|---|---|
| Integrated FPV camera system | Buyers who want goggles, assisted controls, stabilized recording, and a controlled ecosystem | DJI Avata 2 | Exact goggles and controller bundle, battery count, manual-controller availability, software-support horizon, and local weight-based rules |
| Complete ready-to-fly kit | Beginners who want a drone, radio, goggles, battery, and charger chosen as one learning package | BETAFPV Aquila20 FPV Kit | Analog video expectations, included battery count, proprietary battery connector, spare-parts availability, and the difference between assisted and Manual modes |
| Radio and simulator first | Learners who expect to fly several bind-and-fly or custom quads and want to build manual stick skills first | RadioMaster Pocket ELRS | Buy the correct ELRS version, add the required 18650 batteries, confirm simulator support, and remember that goggles and the drone are separate purchases |
Path 1: integrated and assisted
Choose this route when the main goal is an immersive camera-drone experience with less component matching. DJI publishes a maximum 23-minute flight-time rating for Avata 2 under controlled conditions, O4 video transmission, and support for both its motion-control and conventional FPV-controller paths. The tradeoff is a proprietary ecosystem and a higher replacement cost than many small practice quads.
Path 2: a complete beginner kit
Choose a ready-to-fly kit when you want the manufacturer to match the basic aircraft, radio, goggles, battery, and charger. BETAFPV lists the 122 g analog Aquila20 with N, S, and M flight modes, altitude hold in N mode, ExpressLRS 2.4 GHz control, and an approximately 10-minute manufacturer-rated flight time. It creates a clearer bridge from assisted hovering to manual control than assembling unrelated parts for a first flight. Our beginner FPV kit comparison puts complete RTF options side by side by included hardware, learning difficulty, video ecosystem, hidden costs, and upgrade path.
Complete beginner-kit example

Featured gear
BETAFPV Aquila20 FPV Kit
The BETAFPV Aquila20 FPV Kit is a complete analog RTF system with a 122 g brushless whoop, ExpressLRS LiteRadio 4 SE transmitter, VR04 DVR goggles, assisted N mode, Manual mode, and approximately ten-minute manufacturer-rated…
The BETAFPV Aquila20 FPV Kit is a complete analog RTF system with a 122 g brushless whoop, ExpressLRS LiteRadio 4 SE transmitter, VR04 DVR goggles, assisted N mode, Manual mode, and approximately ten-minute manufacturer-rated flights.
- Best for
- Best for a beginner who wants a complete analog FPV learning kit with assisted…
- Skill level
- Beginner to Intermediate
- Product type
- Beginner Drones, Drones, Under 249g Drones
- Best for
- A beginner who wants a complete analog FPV learning kit with assisted hovering, simulator-compatible…
- Skill level
- Beginner to Intermediate
- Product type
- Analog Ready-to-Fly FPV Whoop Kit
Path 3: radio and simulator first
Choose this route when the long-term goal is traditional hobby FPV. RadioMaster lists the Pocket with EdgeTX, Hall-effect gimbals, an internal ELRS 2.4 GHz option, and a Nano module bay. The radio is only the control side of the system. You still need an ELRS-compatible aircraft receiver plus a separately compatible video system and goggles.
The point of these three paths is not to declare one universally best. It is to match the first purchase to the skills and equipment you want to carry forward into the next aircraft.
FPV safety and flight rules
FPV goggles improve immersion but reduce the pilot's view of people, aircraft, terrain, and changing conditions outside the camera frame. That makes a deliberate launch area, a spotter when appropriate, and conservative flight planning important even when the aircraft is small.
Before every FPV flight
- Check the frame, propellers, motors, battery retention, antennas, and connectors for damage.
- Confirm that the radio and video links are connected and stable before arming.
- Verify the selected model, arm switch, flight mode, failsafe behavior, and battery warnings.
- Keep people clear of the aircraft during arming and disarming.
- Identify the flight boundary, obstacles, emergency landing area, and any approaching aircraft.
- Stop before battery reserve, signal quality, weather, or visibility becomes marginal.
Rules depend on the country and purpose of the flight. In the United States, FAA recreational guidance requires TRUST, visual line of sight or a co-located visual observer in direct communication, compliance with airspace restrictions, and registration for drones weighing 250 g or more. If a recreational aircraft requires registration, Remote ID generally applies unless an exception such as operation within a FRIA applies. Commercial and other non-recreational flights normally use different requirements.
Do not interpret a manufacturer's maximum transmission distance as permission to fly that far. Signal range, battery endurance, terrain, interference, visual-line-of-sight requirements, and the need to return with a safe reserve are separate constraints.
Final takeaway
An FPV drone is best understood as a complete piloting system, not just an aircraft with a camera. The drone, radio link, video link, goggles, batteries, charger, firmware, and flight mode all shape the experience.
Start by choosing the kind of flying you want. An integrated system reduces setup complexity, a complete ready-to-fly kit offers a contained learning path, and a radio-first approach develops reusable manual-flight skills. Whichever route you choose, verify every compatibility point, practice before flying aggressively, and follow the operating rules where you fly. Once you know your preferred use case, the FPV drone guide by use case is the next place to compare actual aircraft.
Sources
- Betaflight: About Betaflight: official project documentation explaining flight-controller functions, sensor input, ESC commands, and onboard peripherals.
- ExpressLRS Getting Started: official setup documentation covering transmitter and receiver firmware, receiver wiring, flight-controller configuration, binding, and bench testing.
- FAA Recreational Flyers and FAA Remote ID: official U.S. guidance for TRUST, registration, visual line of sight, visual observers, airspace, and Remote ID.
- DJI Avata 2 Specifications: official weight, flight-time conditions, O4 video transmission, GNSS, sensing, and integrated-system specifications.
- BETAFPV Aquila20 FPV Kit: official specifications for the analog RTF kit, N/S/M flight modes, ExpressLRS control, battery, weight, and manufacturer-rated flight time.
- RadioMaster Pocket Radio Controller: official specifications for EdgeTX, ELRS and CC2500 versions, Hall-effect gimbals, Nano module bay, and required 18650 batteries.
Last checked: August 22, 2026