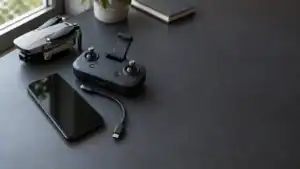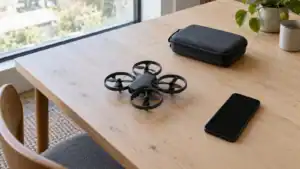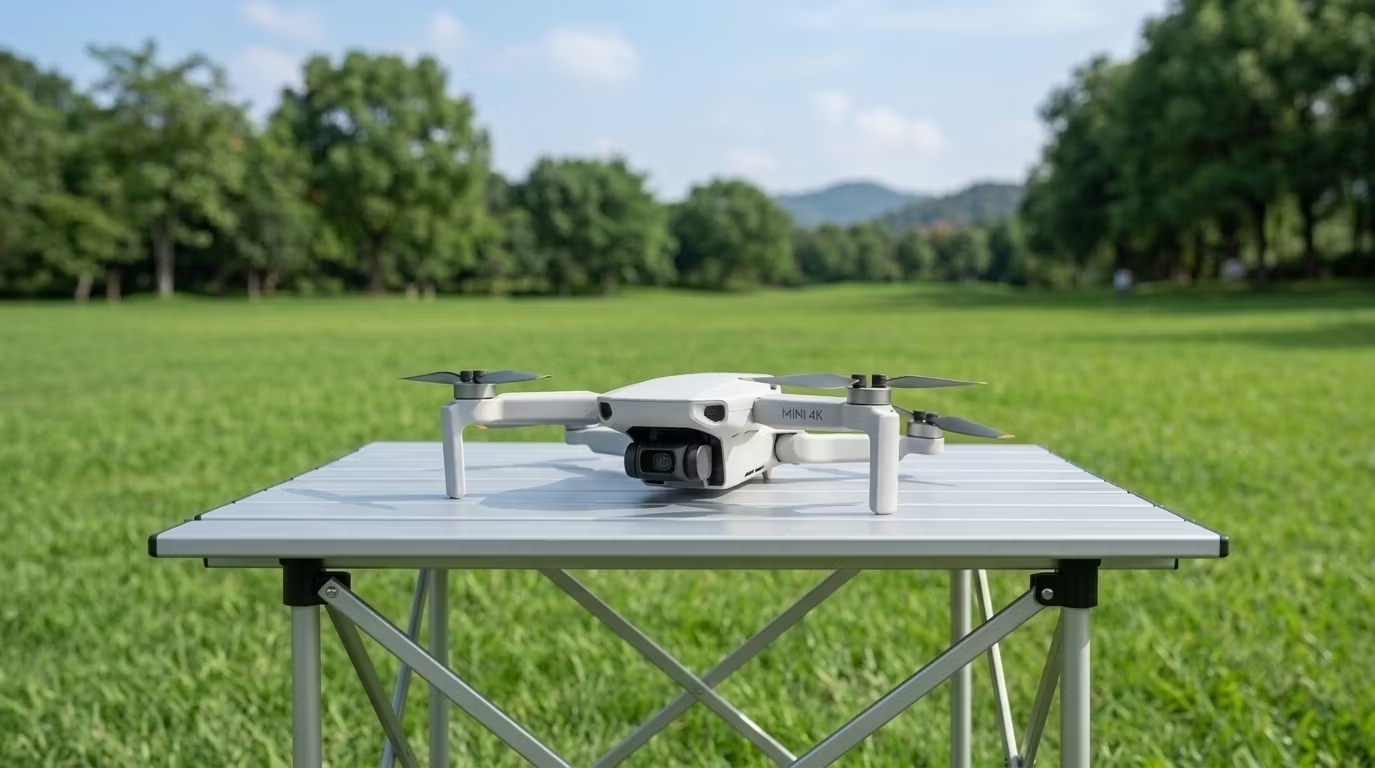
A good DJI Mini 4K setup happens in two places: at home, where you charge, activate, update, and configure the drone, and at the flying site, where you check the airspace, weather, aircraft, GPS, Home Point, and launch area. Completing those jobs in that order makes the first flight much calmer.
Before takeoff, charge the aircraft battery and controller, remove the gimbal protector, unfold the arms correctly, connect a compatible phone to the RC-N1C controller, install DJI Fly, activate the drone, update firmware, install and test a suitable microSD card, configure Return to Home, check the airspace, and wait for Home Point confirmation.
This DJI Mini 4K setup checklist is based on current DJI specifications, the official downloads page, the DJI Mini 4K User Manual v1.0, and current U.S. FAA recreational-flyer guidance. It is not presented as original FPV Drone flight testing. App requirements, firmware, airspace services, and regulations can change.
Quick setup answer
Do the internet-dependent work at home, verify the aircraft and location again at the field, and make the first flight a short control check rather than a camera mission.
Complete at home
Charging, DJI Fly installation, activation, firmware, microSD setup, phone compatibility, and initial safety settings.
Verify on site
Airspace, restrictions, wind, launch area, propellers, battery seating, warnings, GPS, Home Point, and RTH altitude.
First-flight goal
A low hover, small control inputs, predictable braking, correct orientation, and a controlled landing with generous reserve.
Featured DJI Mini 4K

Featured gear
DJI Mini 4K Drone: Beginner 4K Camera Drone Under 249g
The DJI Mini 4K is an entry-level DJI camera drone built for beginners who want stabilized 4K footage without jumping into the higher-priced Mini models. It weighs under 249 g, supports 4K/30fps video, uses…
The DJI Mini 4K is an entry-level DJI camera drone built for beginners who want stabilized 4K footage without jumping into the higher-priced Mini models. It weighs under 249 g, supports 4K/30fps video, uses a 3-axis gimbal, and includes GPS-assisted flight features like Return to Home.
- Best for
- Best for new pilots who want a lightweight DJI camera drone with stabilized 4K…
- Skill level
- Beginner
- Product type
- Beginner Drones, Camera Drones, DJI Drones, Drones, Under 249g Drones
- Best for
- New pilots who want a lightweight DJI camera drone with stabilized 4K video, GPS-assisted…
- Skill level
- Beginner
- Product type
- Camera Drone
The complete DJI Mini 4K setup sequence
Use this table as the master order. The final column gives a simple pass condition before moving to the next phase.
| Phase | Main tasks | Pass before moving on |
|---|---|---|
| 1. Inventory | Confirm the aircraft, RC-N1C controller, battery, sticks, phone cables, USB-C cable, gimbal protector, and bundle accessories. | Nothing essential is missing, incompatible, or visibly damaged. |
| 2. Power | Charge the flight battery to activate it from hibernation, then charge the aircraft battery, controller, and phone. | All devices have adequate power and the battery is at a normal temperature. |
| 3. Hardware | Remove the gimbal protector, unfold the arms, inspect the propellers, install the controller sticks, and secure the phone. | Gimbal moves freely, arms are open, propellers are sound, and the phone cable is secure. |
| 4. App and activation | Install DJI Fly from an official source, sign in, connect the controller and aircraft, and complete online activation. | The camera view appears and no activation prompt remains. |
| 5. Firmware and storage | Install current firmware, insert a compatible microSD card while powered off, format it, and record a test clip. | Firmware is current and the test file records and plays correctly. |
| 6. Rules and airspace | Identify the governing rules, complete required training, check registration status, and review current airspace and site restrictions. | You know the planned flight is allowed at that location and time. |
| 7. Safety settings | Select Normal mode, review limits, choose the lost-signal action, and set an appropriate RTH altitude. | The settings match the site rather than a previous flight. |
| 8. Preflight | Check weather, launch surface, people, obstacles, aircraft condition, battery seating, GPS, warnings, and Home Point. | The correct Home Point is confirmed and no unresolved warning remains. |
| 9. First flight | Hover low, test small inputs and braking, practice orientation, then land manually with reserve. | The aircraft responds predictably and lands without a low-battery emergency. |
Before you start: what you need
Bundle contents vary, so compare the listing with the box before discarding packaging. At minimum, you need the aircraft, compatible flight battery, RC-N1C controller and sticks, the correct phone connection cable, a USB-C charging cable, a compatible phone, and access to power.
Required for initial setup
- a compatible iPhone or Android phone;
- internet access for activation and firmware downloads;
- the correct controller cable for the phone;
- a compatible USB Power Delivery charger and cable;
- a DJI account for activation.
Strongly recommended
- a microSD card that meets DJI's current speed and model guidance;
- a clear table with enough room to unfold the aircraft;
- the official manual saved to the phone;
- a quiet, open first-flight location;
- a second battery for an unhurried learning session.
DJI lists the standard takeoff weight as 246 g, including the battery, propellers, and a microSD card. That number can simplify some requirements, but it does not erase operating rules. Our DJI Mini 4K specifications guide explains the camera, battery, transmission, GPS, and storage limits before setup.
At-home setup: charge, assemble, activate, and update
1. Charge the flight battery, controller, and phone
DJI ships the Intelligent Flight Battery in hibernation for safety. Charging activates it for first use. Charge the pack inside the aircraft or a compatible charging hub, charge the RC-N1C separately, and begin activation with the phone charged as well.
DJI lists a battery charging-temperature range of 5°C to 40°C. Do not charge a hot battery immediately after flight; let it cool naturally first. Our DJI Mini 4K battery guide covers charging time, storage, reserve planning, and the value of spare packs.
2. Remove protectors before powering on
Remove any propeller holder, then remove the clear gimbal protector. DJI instructs pilots to remove the protector and unfold the arms before power-on. The gimbal needs room to complete its startup movement.
3. Unfold and inspect the aircraft
Unfold the two front arms first, then the rear arms, and open the propeller blades. Do not force an arm or carry the drone by its blades. Look for cracks, chips, distortion, loose screws, debris, or incorrect propeller mounting.
4. Prepare the RC-N1C and phone
Remove the control sticks from their storage slots and screw them into the controller. Raise the phone holder, select the Lightning, USB-C, or Micro-USB cable that fits the phone, and seat the phone without pressing a side button. The cable should fit fully without being stretched.
5. Install DJI Fly from the official page
Use the official DJI Mini 4K downloads page, particularly on Android. As checked July 13, 2026, DJI lists DJI Fly V1.21.4 for iOS and Android, requires iOS 13 or later, and requires Android 9 or later. DJI's tested-device list and app requirements can change, so verify the specific phone.
6. Activate the aircraft while online
Power on the controller and aircraft, open DJI Fly, sign in, and follow the on-screen prompts. The Mini 4K requires activation before first use, and the phone needs an internet connection for that process. Complete it at home instead of relying on mobile service at the field.
7. Install firmware updates
DJI Fly displays a notification when firmware is available. Keep the phone online, leave the aircraft and controller connected, and do not close the app or disconnect cables during the update. Start with fully charged equipment rather than trying to meet a minimum battery threshold.
The aircraft may restart and the gimbal can go limp temporarily during an update. Afterward, reconnect and review important safety, camera, and control settings in case an option changed or reset.
Power-on rule: remove the gimbal protector before every startup. Reinstall it only after the aircraft is powered off and the gimbal has stopped moving.
Check current DJI Mini 4K packages
Compare the controller, battery count, charging equipment, microSD card, accessories, condition, and warranty region before choosing a bundle.
Install and test the microSD card
The Mini 4K has no internal media storage. DJI recommends a compatible microSD card and publishes a current list of tested models. For high-resolution video, use media that meets DJI's speed guidance rather than choosing by capacity alone.
- Power off the aircraft before inserting or removing the card.
- Insert the card in the orientation shown in the manual.
- Power on, open DJI Fly, and confirm that available storage appears.
- Back up existing files, then format the card through DJI Fly.
- Record a short 4K clip, stop recording, and play the file back.
A card can be recognized yet fail during sustained video recording. Testing it at home prevents a successful flight from ending with missing footage. Check DJI's current recommended microSD card list before buying or troubleshooting.
Complete the legal and airspace setup before flying
Drone setup includes the pilot and location, not only the hardware. The rules depend on country, purpose, airspace, site, and aircraft configuration.
For U.S. recreational flights, the FAA says drones weighing 250 g or more must be registered. The standard Mini 4K is listed at 246 g, but attached equipment can change its actual weight, and a non-recreational operation generally falls under Part 107 rather than the recreational exception.
Under current FAA recreational-flyer guidance, U.S. pilots must complete the free TRUST test and carry proof, keep the drone within visual line of sight, give way to crewed aircraft, obtain authorization before entering controlled airspace, and remain at or below 400 feet in Class G airspace. If registration is required, Remote ID requirements generally apply unless the flight qualifies for an exception such as operation within a FRIA.
Use an FAA-approved B4UFLY service to review controlled and special-use airspace, airports, critical infrastructure, national parks, military training routes, and Temporary Flight Restrictions. The map provides situational awareness; it does not replace authorization, property permission, park rules, local restrictions, or conditions at the site.
U.S. recreational pilot
- Complete TRUST and carry proof.
- Determine whether the aircraft and operation require registration and Remote ID.
- Check current airspace and obtain authorization when required.
- Fly within visual line of sight and follow applicable CBO safety guidelines.
Every location
- Confirm site access or landowner permission.
- Check current national, regional, and local restrictions.
- Review Temporary Flight Restrictions and emergency activity.
- Plan clear launch, flight, return, and landing areas.
Outside the United States, use the aviation regulator and local authorities for the country where the flight will occur. A sub-250 g label is not a universal exemption.
Configure beginner-friendly safety settings
Open the Safety and Control menus in DJI Fly while the aircraft is connected. Menu names can move between app versions, but the decisions remain similar.
| Setting | Beginner approach | Why it matters |
|---|---|---|
| Flight mode | Use Normal mode for early flights. | Sport mode increases speed and braking distance. Normal provides the clearest baseline. |
| Maximum altitude | Set a conservative site-appropriate limit below the legal ceiling. | A software limit is not permission to ignore airspace, visibility, or local rules. |
| Maximum distance | Keep it short while learning. | Orientation, visual line of sight, wind, battery, and return margin matter before radio range. |
| RTH altitude | Set it to clear the tallest relevant obstacle while staying within applicable limits. | The Mini 4K cannot detect forward obstacles during return. |
| Lost-signal action | Select RTH only after understanding the route; Land or Hover can fit unusual sites. | Under cover, over water, or near obstacles, each action carries different risks. |
| Units and camera | Choose familiar units, a known video mode, grid lines, and useful exposure warnings. | Clear displays and a preset camera reduce workload in the air. |
The Mini 4K uses GPS, GLONASS, and Galileo for outdoor positioning and Home Point functions. Read how DJI Mini 4K GPS and Return to Home work before treating RTH as a complete safety net.
Keep the distance limit conservative as well. Our DJI Mini 4K range guide explains why transmission capability, battery range, legal visibility, and safe-return distance are different limits.
At the flying site: the two-minute preflight
Do not rush because the camera view appears. Repeat the same short sequence before each battery and whenever the launch point changes.
Location and conditions
- Recheck airspace, authorization, Temporary Flight Restrictions, site rules, and nearby emergency activity.
- Assess actual wind, gusts, visibility, temperature, precipitation, and the expected return direction.
- Choose a flat, dry, open surface away from people, traffic, wires, trees, water, and large metal structures.
- Do not launch from a moving object, vehicle roof, metal cover, or unsuitable reinforced surface.
Aircraft and app
- Remove the gimbal protector and unfold all four arms.
- Inspect every propeller and motor; confirm the battery is fully seated.
- Clean the camera and downward sensors and confirm the microSD card is installed.
- Power on, connect DJI Fly, and resolve compass, IMU, firmware, storage, battery, or zone warnings.
- Calibrate only when DJI Fly requests it or the manual's troubleshooting guidance calls for it.
GPS and return plan
- Wait for suitable positioning and the Home Point confirmation.
- Verify that the Home Point marker matches the launch location.
- Recheck RTH altitude, lost-signal action, aircraft battery, controller battery, and route.
- Confirm the launch and landing zone remains clear immediately before starting the motors.
Do not calibrate the compass beside a vehicle or metal structure. If DJI Fly shows a warning, move the aircraft to a cleaner open area first. Do not fly until a persistent warning is understood and resolved.
A safer DJI Mini 4K first-flight routine
The first flight is a control check, not a camera mission. Keep the aircraft close enough to see its orientation clearly and remain over a forgiving open area.
- Start in Normal mode. Stand behind the aircraft with its nose pointing away so the stick directions feel intuitive.
- Take off and hover low. Rise to roughly eye level, release the sticks, and observe whether the aircraft holds position normally.
- Test one axis at a time. Move forward and back, left and right, then yaw in each direction with small inputs.
- Check braking. Release the sticks after a short movement and observe how much space the aircraft needs to stop.
- Practice orientation. Rotate 90 degrees, make small movements, and return the nose to the original direction before becoming confused.
- Land manually. Return over the landing zone, descend slowly, and keep the area clear until the motors stop.
- End early. Land with generous reserve rather than using the first battery to explore maximum range.
Keep RTH available, but do not use it as an excuse to fly farther. The Mini 4K lacks forward obstacle avoidance. Learn how to cancel RTH and resume control before that skill is needed under pressure.
Postflight checklist and common setup mistakes
After landing
- Stop recording before power-off so the video file can close correctly.
- Power off the aircraft, then the controller, and confirm the motors and gimbal are inactive.
- Inspect the propellers, motors, battery, and airframe for damage, debris, or unusual heat.
- Let the battery cool before charging.
- Back up important footage before formatting or reusing the card.
- Fold the aircraft and reinstall the gimbal protector only after power-off.
- Record any warning or unexpected behavior while the details are fresh.
| Mistake | Why it causes trouble | Better habit |
|---|---|---|
| Powering on with the gimbal protector installed | The gimbal cannot complete its startup movement. | Remove the protector before every power-on. |
| Activating or updating at the field | Poor internet, heat, low battery, and time pressure can interrupt setup. | Activate, update, and test at home. |
| Forgetting the microSD card | The aircraft has no internal storage for normal 4K capture. | Install, format, and test a compatible card before travel. |
| Taking off before Home Point confirmation | RTH may not use the intended return location. | Verify positioning, map marker, and Home Point message. |
| Using Sport mode immediately | Higher speed and longer braking distance leave less correction room. | Learn in Normal mode in a wide open area. |
| Assuming 246 g means no rules | TRUST, airspace, purpose, site, visibility, and local restrictions still apply. | Check the operation and location, not only weight. |
| Reusing one RTH altitude everywhere | A safe value at one site may be too low, too high, or illegal at another. | Review it at every location. |
Quick DJI Mini 4K setup troubleshooting
DJI Fly does not detect the controller
Unlock the phone, confirm the cable type and orientation, remove a case that blocks full insertion, and restart the app. A charging symbol alone does not prove the phone has a working data connection. Verify the phone against DJI's current compatibility list.
The aircraft will not activate
Confirm that the phone is online, DJI Fly is current, the correct account is signed in, and both devices have adequate power. Complete any terms or regional prompts. Save the exact error message if the problem continues.
There is no GPS or Home Point
Move outdoors to an open area with a broad view of the sky. Buildings, dense trees, covered structures, indoor locations, and interference can reduce positioning. Do not take off simply because the motors can start.
The microSD card is missing or unavailable
Power off before reseating the card. Confirm that it meets DJI's current requirements, back up its contents, and format it through DJI Fly. Try a recommended card if the warning remains.
A compass warning appears
Move away from vehicles, steel structures, reinforced surfaces, magnets, speakers, and power equipment. Calibrate only when DJI Fly requests it or current DJI troubleshooting guidance calls for it. Do not fly while a warning persists.
Final verdict: is the DJI Mini 4K easy to set up?
Yes, when setup is treated as a sequence rather than a race to takeoff. Physical preparation is straightforward, DJI Fly guides activation, and GPS-assisted hovering makes an open-area first flight approachable.
The steps that deserve the most attention are phone compatibility, charging, firmware, microSD storage, airspace, Home Point confirmation, wind, and Return to Home settings. The Mini 4K does not protect a beginner with forward obstacle avoidance, so a clear launch site and conservative route matter more than automation.
Complete the online work at home, repeat the short preflight at the site, and make the first battery a control lesson. For a full buying assessment, see our DJI Mini 4K beginner review.
Compare current DJI Mini 4K offers
Verify the controller, battery count, charging equipment, microSD card, condition, seller, and warranty region before comparing prices.
DJI Mini 4K setup FAQs
Does the DJI Mini 4K need activation?
Yes. Connect the controller, aircraft, and phone, sign in to DJI Fly, and follow the activation prompts while the phone has internet access.
Do I need internet to fly the DJI Mini 4K?
Internet is required for activation and firmware downloads and may be needed for account, map, or airspace services. The aircraft's GPS and controller link do not depend on cellular service during a normal flight, but prepare maps and required authorizations before visiting an offline location.
Which app does the DJI Mini 4K use?
It uses DJI Fly. Download it through DJI's official Mini 4K downloads page or the official iOS source linked there, and check the current operating-system and device compatibility list.
Does the DJI Mini 4K need a microSD card?
A compatible microSD card is needed for the normal 4K recording workflow because the aircraft has no internal storage. DJI publishes a list of recommended cards.
Should I charge the DJI Mini 4K before first use?
Yes. Charging activates the flight battery from shipping hibernation. Charge the aircraft battery, controller, and phone before activation, updates, and the first flight.
Does the DJI Mini 4K include a wall charger?
The standard package can include a USB-C cable without a wall power adapter. Bundle contents vary, so verify the listing and use a compatible USB Power Delivery charger.
Should I calibrate the compass before every flight?
No. Calibrate when DJI Fly prompts you or current DJI troubleshooting guidance calls for it. Perform the procedure away from vehicles, metal, reinforced concrete, magnets, and electrical interference.
How do I know the Home Point is set?
DJI Fly provides a voice or on-screen confirmation, and the Home Point should appear at the correct map location. Verify the marker before takeoff.
What flight mode should a beginner use?
Use Normal mode for the first flights. It provides standard response and GPS-assisted positioning without Sport mode's higher speed and longer braking distance.
Can I fly the DJI Mini 4K indoors for the first setup?
Power-on checks can be completed indoors after removing the gimbal protector, but an indoor first flight is a poor beginner choice. GPS may be unavailable, vision positioning depends on light and surface texture, space is limited, and the drone lacks forward obstacle avoidance.
Does the DJI Mini 4K need FAA registration?
For a purely recreational U.S. flight, the standard 246 g configuration is below the FAA's 250 g registration threshold. Registration may be required if equipment raises the weight to 250 g or more or if the operation is not covered by the recreational exception. TRUST and other rules still apply.
Is one battery enough for the first flight?
One fully charged battery is enough for a short hover, control check, and landing when setup is already complete. A second battery allows the basics to be repeated without rushing, but it does not replace cooling, inspection, or reserve planning.
Sources
- DJI Mini 4K User Manual v1.0: preparation, activation, charging, firmware, storage, flight modes, GPS, Home Point, Return to Home, operating environment, and first-flight procedures.
- DJI Mini 4K downloads and compatibility page: current DJI Fly versions, phone requirements, manuals, quick-start guides, and release notes.
- DJI Mini 4K specifications: weight, flight time, wind resistance, GNSS, storage, battery, charging, and recommended microSD cards.
- FAA Recreational Flyers and Community-Based Organizations: current U.S. recreational TRUST, registration, visual-line-of-sight, airspace, altitude, and Remote ID guidance.
- FAA B4UFLY: approved airspace-awareness services and the information they provide.
Last checked: July 13, 2026. DJI app versions, compatible phones, firmware, airspace services, product bundles, and regulations can change.